How to Plant, Care for, and Propagate Ranunculus
Discover how to plant, care for, and propagate ranunculus, one of the most striking spring flowers with lush blooms in various colors.
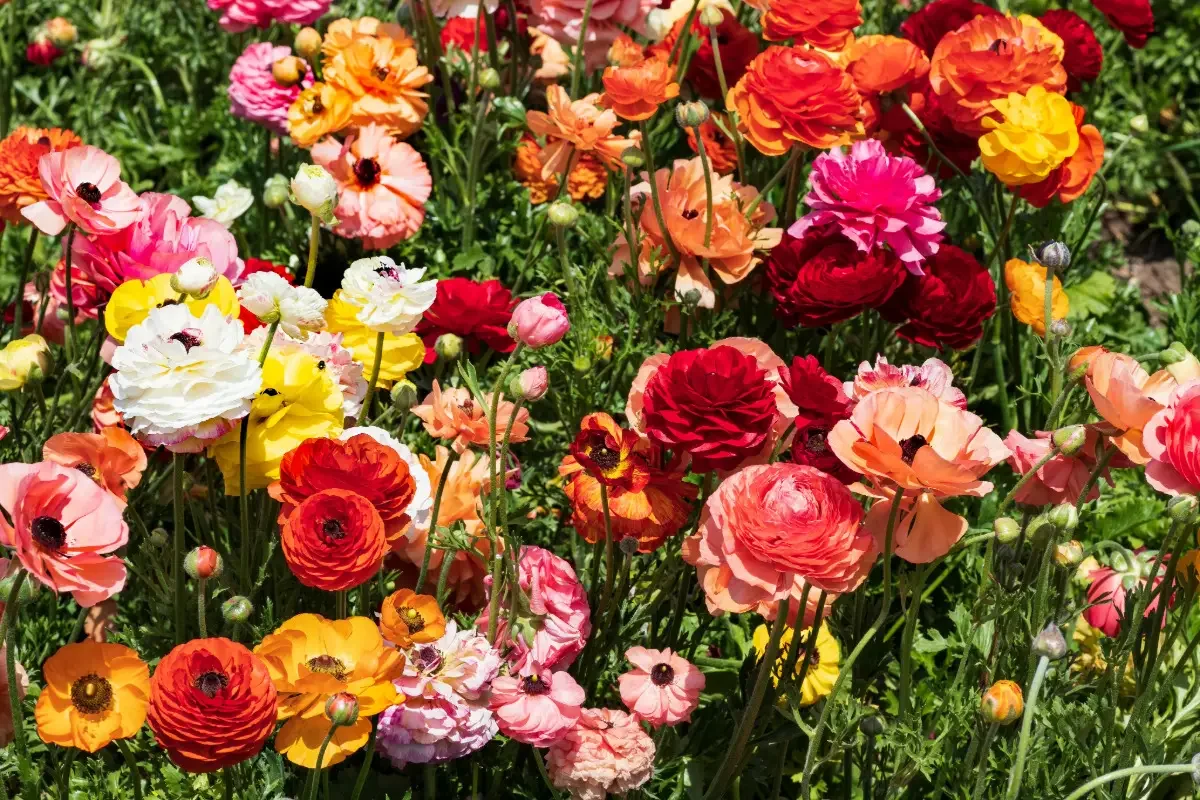
Ranunculus, with their densely packed, rosette-like blooms, stand out as one of the most striking flowers in spring gardens. Here’s how to plant, care for, and propagate these beautiful plants.
Ranunculus (Ranunculus asiaticus) are favored for their lush flowers, which bring vibrant color to gardens and containers starting in late spring. They come in a wide array of colors, including white, pink, red, yellow, orange, and violet, with both solid and multicolored varieties available. With proper care, ranunculus can bloom for six to eight weeks, providing a delightful floral display year after year.
Ranunculus Profile
Originating from the eastern Mediterranean, ranunculus belong to the buttercup family and have been cultivated in Europe since the 16th century. They have transitioned from a classic cut flower to a beloved garden plant.
Ranunculus (Ranunculus asiaticus)
- Height: 20 – 40 cm
- Width: 10 – 20 cm
- Blooming Period: April to June
- Root System: Shallow-rooted
- Location: Sunny to partial shade
- Soil: Loose, humus-rich, and well-drained
Location
Ranunculus thrive in bright yet cool conditions. They bloom most vigorously in sunny to partially shaded areas. Providing light protection from intense midday sun helps keep the flowers fresh longer and supports the vitality of the plants.
Soil
These flowers flourish in nutrient-rich, humus-filled, and well-draining soil. Heavy clay soils benefit from the addition of sand and compost, while pots should include expanded clay for improved drainage.
Planting Instructions
Ranunculus can be planted directly in the garden or pots starting in April, once the risk of prolonged frost has passed. For those wishing to get a head start, the bulbs can be pre-sprouted indoors in small pots from March, and later moved outdoors when the ground is no longer frozen.
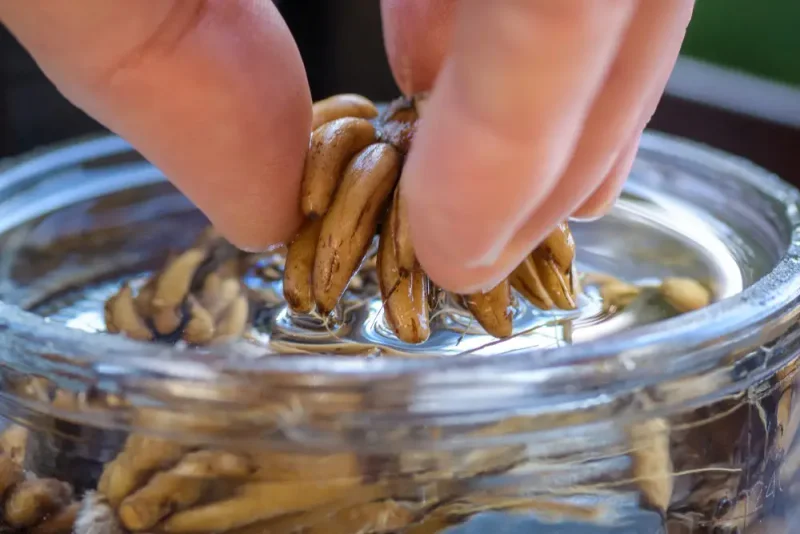
- Soak the bulbs in lukewarm water for 3–4 hours.
- Prepare the planting hole, incorporating a layer of expanded clay or sand for heavy soils.
- Plant the bulbs with the “claws” facing down, at a depth of 5 cm, and cover with soil.
- Maintain a planting distance of 10 to 20 cm between bulbs.
- Water after planting and keep the soil evenly moist.
💡 Tip: Planting Ranunculus in Pots For container gardening, choose a pot that is at least 25 to 30 cm deep with sufficient drainage holes. Allow for a planting distance of about 10 to 15 cm per bulb. A 30 cm diameter pot can accommodate two bulbs comfortably, or three if planted closely. Ensure the soil is loose and well-drained to prevent bulb rot.
Suitable Companions for Ranunculus
Ranunculus pair beautifully with other early bloomers. Delicate companions include freesias, forget-me-nots, grape hyacinths, tulips, and heuchera. Planting in a monochromatic scheme can create an elegant look, while contrasts with blue and violet add vibrancy.
💡 Tip: While filled ranunculus are visually stunning, they provide little nourishment for wild bees and butterflies. To support pollinators in spring, consider planting pansies, myosotis, or muscari alongside them.
Caring for Ranunculus
Watering
The soil around ranunculus should remain consistently moist but not waterlogged. Excess water can lead to bulb rot. In pots, the soil dries out more quickly, so it’s important to water more frequently but in moderation.
Fertilizing
During the blooming period, ranunculus should be fed with liquid fertilizer or organic nutrients every two to three weeks. Regularly removing spent flowers extends blooming and prevents seed formation.
Pruning
Ranunculus do not require traditional pruning. Simply remove spent flower stems or cut them just above the foliage. After the blooming period, cut back any wilted plant parts to initiate a gradual dormancy.
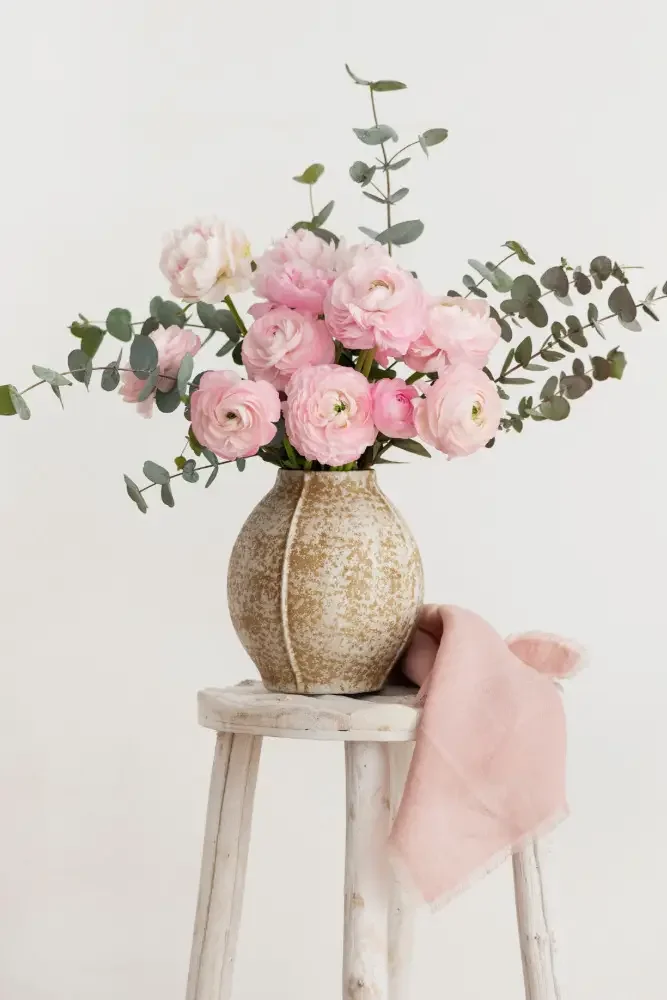
Tip: Using Ranunculus as Cut Flowers Ranunculus make excellent cut flowers. For the longest vase life, cut stems when the buds are just beginning to open. A diagonal cut, fresh water, and a cool location will help prolong their beauty. They are also a vibrant addition to bridal bouquets.
Wintering
Ranunculus are only partially hardy in winter. In milder regions, the bulbs may survive in the ground, but it is safer to dig them up. After the foliage yellows (June–July), the bulbs should be excavated, dried for two days in the air, and stored in a cool, dark place in sand at 5–10°C during winter. This natural dormancy is essential for robust spring growth.
Are Ranunculus Toxic? Ranunculus are considered toxic and can cause skin irritation in sensitive individuals.
Propagating Ranunculus
Ranunculus can be propagated in three ways: through bulb offsets, bulb division, and seed sowing.
Propagation via Bulb Offsets (Simple Method)
Ranunculus naturally produce side offsets from the main bulb. These small offshoots can be identified when the bulbs are dug up in summer and can be separated using a clean, sharp knife. After drying them like the main bulbs, they should be stored cool and frost-free in sand over winter. In spring, they can also be soaked in water for a few hours before planting.
Propagation by Bulb Division
Large, healthy bulbs can also be divided during excavation. After drying, the sections should be stored separately over winter and planted in spring. However, not all sections will reliably sprout, making propagation via offsets a more reliable method.
Propagation by Sowing Seeds
The most labor-intensive method involves propagating ranunculus from seeds. To do this, leave a few flower stems standing after blooming. The seeds will mature in the old flower heads and can be collected in the fall once they are dry and brown.
Step 1: Allow Seeds to Mature Only harvest seeds when the fruiting bodies are dry and mature. Early harvests yield poor germination rates. Store the seeds in a cool, dry, dark place, such as a small paper bag.
Step 2: Choose Sowing Time Sowing can occur in early spring in seed trays. It’s important to have a bright, cool, and frost-free location. Alternatively, seeds can be sown in early autumn, but young plants will need protection from frost.
Step 3: Prepare Seedling Container and Sow Fill a shallow seed tray or small pots with fine, loose seed compost. The substrate should be well-draining and evenly moist. Scatter the fine seeds and lightly press them down. Optionally, a thin layer of fine sand can be used to cover the seeds.
Step 4: Allow to Germinate in Cool Conditions Ranunculus germinate best at cool temperatures of around 10 to 15 °C. Warmer conditions can lead to weak, leggy seedlings. Under optimal conditions, seedlings usually appear within 10 to 20 days, though it may take longer.
Step 5: Thin Seedlings and Continue Cultivation Once seedlings have developed 4 to 5 leaves, they should be carefully thinned and potted into small containers. They should remain in a bright, cool, and frost-free environment. Young garden ranunculus should only be planted outdoors after the last frost.
Pests and Diseases
Ranunculus are generally low-maintenance but can be sensitive to waterlogging, overcrowding, or poor air circulation.
Common diseases include powdery mildew, which appears as a white, powdery coating on leaves, stems, or flowers. Preventive measures include maintaining a loose planting distance, ensuring good airflow, and watering directly at the soil level to keep foliage dry.
At the first signs of infection, affected plant parts should be removed and disposed of in the household waste. Severely infested ranunculus should be removed from the garden to prevent further spread of the fungal disease. Additionally, rot can occur in consistently wet soil, making a well-draining substrate and proper water management crucial.
Snails can also be a problem for ranunculus, particularly when young shoots emerge. Handpicking them in the evening or using snail barriers can help protect the plants. Aphids are also common on young shoots and flower buds. Usually, a strong water spray is enough to dislodge them, or encouraging beneficial insects like ladybugs can help. In cases of severe infestations, approved neem oil products can help control the population.
Conclusion: Planting, Caring for, and Propagating Ranunculus
Ranunculus add a splash of color and elegance to the garden year, making them suitable for both flower beds and pots. While their cultivation requires some attention, the reward is a stunning floral display that also works beautifully in vases.