How to Convert a Standard Electrical Outlet to a Radiator Socket
Transforming a standard outlet into a radiator socket requires specific technical modifications to ensure safety and compliance with electrical standards. Learn about the differences, requirements, and steps necessary for this conversion.
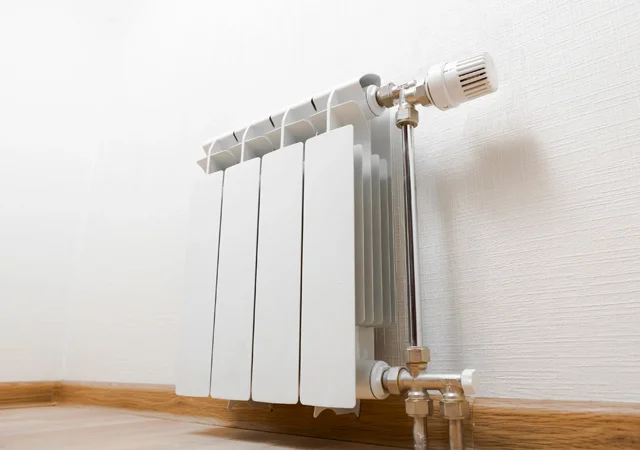
In many homes, the existing electrical installations may not safely accommodate fixed radiators. Standard electrical outlets often lack the capacity to handle the high power demands of heating devices, which can lead to dangerous overheating.
Transforming a conventional outlet into a radiator socket requires precise technical modifications to meet safety regulations.
Understanding the Need for Conversion
Domestic electrical systems feature various types of outlets, each designed for specific uses. This technical differentiation is essential for ensuring safety and performance tailored to each device's requirements.
Technical Differences Between Standard Outlets and Radiator Sockets
A standard electrical outlet typically operates at an intensity of 16A, equating to a maximum power of 3680W. It is usually part of a mixed circuit for lighting and outlets, utilizing cables of 1.5 mm² or 2.5 mm², and is protected by a 16A or 20A circuit breaker.
In contrast, a radiator socket boasts superior technical specifications, supporting a capacity ranging from 16A to 32A, enabling it to power devices up to 7360W.
| Type of Socket | Cable Section | Circuit Breaker | Maximum Power | Circuit Type | |------------------|-------------------|-----------------|---------------|--------------| | Standard Socket | 1.5-2.5 mm² | 16-20A | 3680-4500W | Mixed | | Radiator Socket | Minimum 2.5 mm² | 16-32A | 3680-7360W | Dedicated |
Advantages of a Dedicated Heating Circuit
Having a dedicated circuit for heating prevents overload on the home's general electrical network. This separation allows for the simultaneous operation of household appliances and heating systems without the risk of tripping breakers.
A dedicated installation also adheres to safety volumes, especially in bathrooms, where it must have a protection index of IPX4 or higher. This setup ensures better distribution of electrical loads throughout the home.
Assessing Your Electrical Installation
Before making any changes, it's crucial to evaluate the technical capabilities of your current electrical system. This assessment will determine the feasibility of the project and the necessary modifications.
Minimum Required Cable Section (2.5 mm²)
According to the NF C 15-100 standard, a minimum cable section of 2.5 mm² is required to power a fixed electric radiator. This specification ensures safe current transport without excessive heating of the conductors.
Check the existing cable sections by partially dismantling the current outlet. If the section is insufficient, new cables will need to be run from the electrical panel.
Electrical Panel Capacity and Circuit Addition
Your electrical panel must have available slots for a new dedicated circuit breaker for heating. The total subscribed power with your electricity provider must also be capable of supporting this additional load.
Each fixed radiator exceeding 2000W requires an independent circuit, with a maximum total power of 4500W per circuit using 2.5 mm² cable protected by a 20A circuit breaker.
Gathering Necessary Materials for the Conversion
The success of this transformation hinges on the quality and compliance of the materials used. Each component must meet current French electrical standards.
Essential Electrical Components List
Here are the electrical items you need to acquire for this installation:
- Radiator socket 16A/20A from a reputable brand like Legrand or Schneider, costing between 10 and 20€
- 3G2.5 mm² cable, including phase, neutral, and ground, cut to the length suitable for your installation
- 20A or 16A circuit breaker, depending on your radiator's power
- 30mA differential switch for personal protection
- Waterproof junction box, if intermediate connections are necessary
Required Tools and Safety Equipment
Safety during electrical work requires appropriate personal protective equipment:
- Multimeter to check for voltage absence
- Insulated crimping pliers and screwdriver
- Level for aligning the socket
- Insulated gloves and safety goggles
- Insulating mat to work safely
Executing the Transformation Steps Safely
Caution: These tasks carry risks of electrocution and fire. The NF C 15-100 standard demands proven technical skills. It is strongly recommended to hire a certified professional electrician.
Preparation and Power Shutdown
Before starting any work, turn off the main circuit breaker of your installation. Use a multimeter to confirm that there is no voltage present on all conductors of the outlet to be modified.
Wear your personal protective equipment and prepare your workspace by clearing the intervention area. Label the cut circuit breaker to prevent accidental re-energization.
Installing the Dedicated Circuit
Remove the existing electrical outlet by taking off the cover and unscrewing the connection terminals. Pay close attention to the wire colors: brown or black for phase, blue for neutral, and green/yellow for ground.
If the cable section is inadequate, run a new 3G2.5 mm² cable from the electrical panel to the socket location. Use ICTA conduit to protect the conductors' pathway.
Mounting and Connecting the Radiator Socket
Secure the mounting box for the new radiator socket at the designated location. Ensure it is level and adheres to installation specifications.
Connect the conductors according to the color code: phase to terminal L, neutral to terminal N, and ground to the terminal marked with the earth symbol. Tighten the connections with a torque of 1.5 to 2 Nm to ensure a solid contact.
Adhering to NF C 15-100 Electrical Standards
Compliance with electrical standards ensures the safety of your installation and its approval by regulatory bodies. These regulations evolve regularly to integrate new technologies and enhance user protection.
Specific Requirements for Heating Circuits
Every heating circuit must be protected by a 30mA differential switch to detect current leaks. This protection is in addition to the circuit breaker safeguarding against overloads and short circuits.
The maximum allowable power per heating circuit is 4500W on a 2.5 mm² cable protected by a 20A circuit breaker. For higher power needs, an additional circuit must be created.
Special Rules for Bathrooms
Bathrooms impose specific constraints based on the safety volumes defined by the standards. No outlets can be installed in volumes 0 and 1, which are the areas most exposed to water projections.
In volume 2, only cable outlets for radiators are permitted, with a minimum protection index of IPX4. Class II radiators, featuring double insulation, do not require a ground connection.
Mitigating Risks and Ensuring Installation Safety
Non-compliant electrical installations pose a constant danger to occupants. Preventing these risks involves strict adherence to standards and the use of certified materials.
Potential Dangers of Non-Compliant Installations
A circuit not dedicated to heating can lead to overheating and trigger a fire. Recent recalls by Engie in 2025 concerning certain connected thermostats highlight the importance of compliance in heating installations.
The absence of grounding on a Class I radiator exposes users to potentially fatal electrocution risks. Social media often shares warnings about these dangers, such as a message from @KasprzykRemi that garnered 220,000 views.
Essential Precautions and Power Limits
Never connect a device exceeding 4500W to a standard heating circuit. Adhere to the protection class of your radiators, especially in damp areas where Class II devices offer enhanced safety.
Schedule an annual maintenance check of your electrical system to assess the state of connections and the proper functioning of differential protections. This preventive check can identify issues before they escalate into dangerous situations.
Considering Simpler and Safer Alternatives
There are several solutions available for powering a radiator without modifying the existing electrical installation. These alternatives offer advantages in terms of simplicity and cost while still adhering to safety standards.
Temporary Solutions Without Electrical Modification
A power strip equipped with a thermostat can temporarily power a mobile radiator of low wattage. This solution is limited to devices under 2000W to avoid overloading the existing circuit.
Mobile radiators on wheels can be plugged directly into a standard outlet, providing interesting flexibility in use. Their limited power makes them compatible with standard electrical circuits without requiring modifications.
When to Consult a Certified Professional
The technical complexity of this transformation often necessitates the involvement of a professional electrician. The cost for this service ranges from 200 to 500€ for labor, with an additional 100 to 300€ for materials.
The Consuel certificate, mandatory for insurance purposes, costs between 150 and 300€ and requires an installation that fully complies with regulations. A certified RGE or QualiPV professional ensures this compliance and handles the necessary administrative procedures.